"A plan is only as good as those who see it through."
---Cleaver
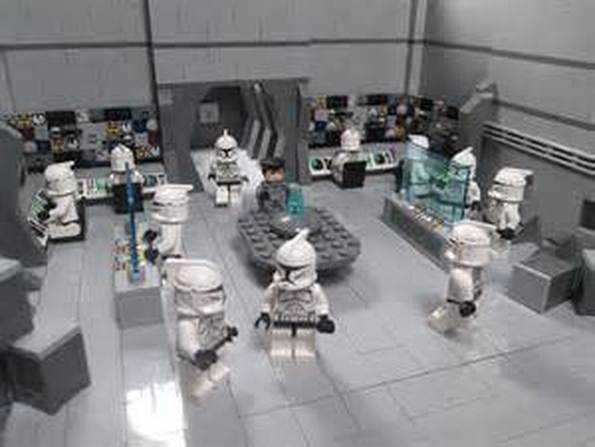
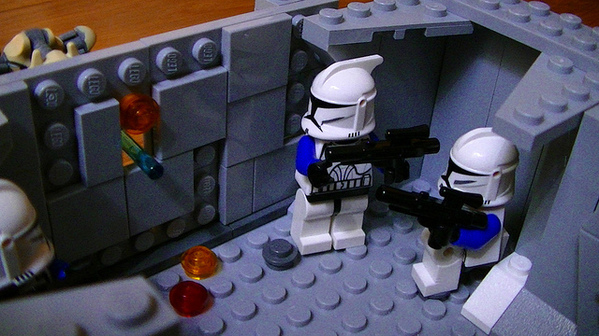
Jedi battle
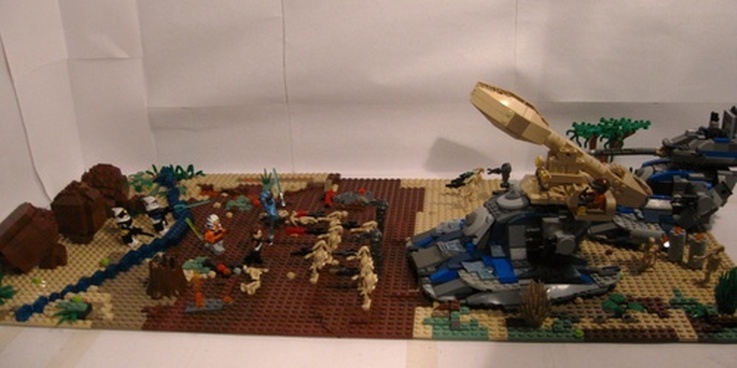
Shortly before the First Battle of Geonosis and the outbreak of the Clone Wars, Obi-Wan Kenobi, Anakin Skywalker, and Padmé Amidala were all scheduled for execution, having been convicted of espionage by Poggle the Lesser. With a mix of ingenuity and Jedi abilities, the trio evaded the beasts long enough for Mace Windu to arrive with a strike force of Jedi Knights, including Joel-nathan Joe. In response, large numbers of battle droids flooded the arena, signaling the start of the Clone Wars. Fighting soon erupted between the two sides. The 212 Jedi were overwhelmed by the sheer amounts of droids and soon only about 30 of them survived overall. A dozen Jedi formed a circle. It would have been a defeat for the Jedi if not for the timely arrival of Master Yoda and the newly christened Grand Army of the Republic, who managed to rout the CIS forces. Shortly after, the battle had moved away from the arena the famed Republic clones of the Special Forces, led by Jedi Knight Joel-nathan Joe, fought their way through, into the High Audience Chamber, slaying the Geonosian lieutenant Sun Fac and shutting down the droid foundry beneath the arena. After the battle had been completely won, Republic forces took control of the planet, and droid remains were taken to be melted down.
The Battle of geonosis
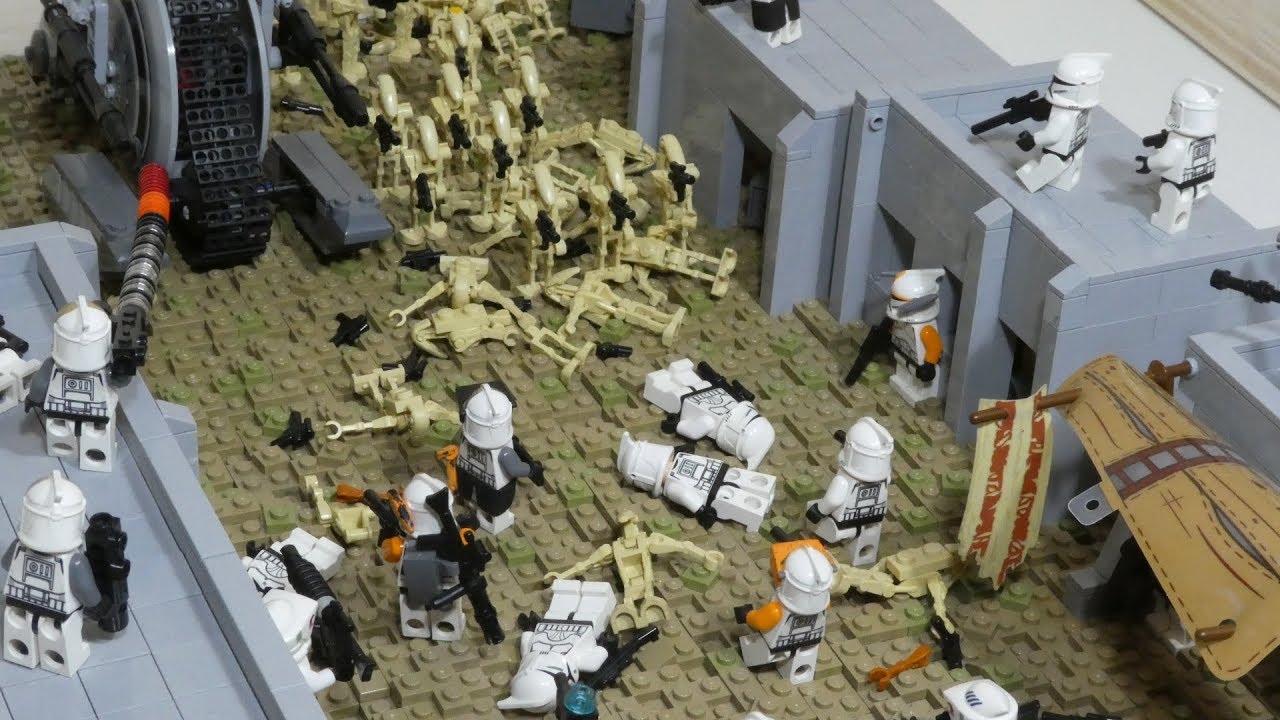
Following the clone army's arrival, Neimoidians on Geonosis fled to their Federation core ships. After the rescue of the Jedi, the droid and clone armies battled one another in an intricate series of confrontations on a number of different fronts. Much of the Separatists' heavy equipment had already been loaded onto their transports, but with their communications being jammed the rest was hastily thrown at the clones in order to buy the Confederacy navy enough time to escape. Meanwhile, the Republic army's goal was to capture the Separatists leadership and as much of the Geonosian droid foundries intact as possible in order to uncover the depths of the Separatist conspiracy, precluding the indiscriminate use of starship weapons. The resulting battle would mostly consist of ground combat then, but, although the clone troopers were greatly outnumbered by battle droids, the Republic enjoyed air dominance thanks to their preemptive strikes on the launch hives. However, at some point during the battle, the Geonosians launched thousands of standby Nantex-class territorial defense starfighters to break the Republic's orbital cordon, which was preventing Separatist ground reinforcements from the Corporate Alliance.
Clone Commander Frost directed his gunship to attack the lightly-armored Techno Union transports while the gunship carrying Joel-Nathan Joe proceeded on to a nearby assembly area. After arriving, Joel-Nathan took command of a number of special commando units. On all fronts the two sides grappled with each other in fierce combat: heavily-armored AT-TE walkers facing down hordes of battle droids. However, when the Trade Federation core ships started to take off, a lone AT-TE fired a shot on a core ship. As homing spider droids swept their laser cannons across clone trooper battalions, Republic gunships strafed the Separatist front lines and lost a number to intense laser flak. As the Trade Federation core ships attempted to take off, Yoda commanded the army's artillery to bring a number of them crashing back to the ground. Because the core ships on Geonosis were ringed with air and land defenses, many of them were able to escape to the skies.
Clone Commander Frost directed his gunship to attack the lightly-armored Techno Union transports while the gunship carrying Joel-Nathan Joe proceeded on to a nearby assembly area. After arriving, Joel-Nathan took command of a number of special commando units. On all fronts the two sides grappled with each other in fierce combat: heavily-armored AT-TE walkers facing down hordes of battle droids. However, when the Trade Federation core ships started to take off, a lone AT-TE fired a shot on a core ship. As homing spider droids swept their laser cannons across clone trooper battalions, Republic gunships strafed the Separatist front lines and lost a number to intense laser flak. As the Trade Federation core ships attempted to take off, Yoda commanded the army's artillery to bring a number of them crashing back to the ground. Because the core ships on Geonosis were ringed with air and land defenses, many of them were able to escape to the skies.
ambush!
Jedi Master Yoda is dispatched to the dried coral moon of Rugosa to convince King Katuunko to allow the Republic to build a base in Toydarian territory. In orbit of the Rugosa moon, two Banking Clan frigates ambush Yoda's ship, forcing him to take an escape pod and allow his ship and Naval Officer Zak to retreat; three clones--Clone Lieutenant Thire, Jek and Rys—accompany him to the surface. Below, Asajj Ventress attempts using a Force mind trick on King Katuunko to persuade him to join the Separatists, but since he is a Toydarian it has no effect. They spot Yoda's escape pod coming down, and Ventress tries to use this to express the Jedi's supposed incapability to protect Toydaria in hopes of swaying the king to her cause. When this fails to impress him, she orders her army of battle droids to attack Yoda and the four clones to show the king their superiority to the Republic. Yoda and his men face off against a large number of droids. The clones ambush them in small groups. Eventually, Thire is wounded, and he is unable to carry his Z-6 heavy rotary cannon. He picks up a severed battle droid head to use as a substitute weapon.
As the droid forces approach, Master Yoda decides to face them alone, ordering his troops to stay out until their help is truly needed. Yoda ends up cutting the whole battalion to pieces, and angered, Ventress sends out three tanks. Yoda swiftly disposes of them, and Ventress counters with ten droidekas to deal with the Jedi Master. Just before the droidekas can finish the Jedi Master, Thire launches their last rocket at an overhanging bluff, sending an avalanche of rock crashing down on the droideka reinforcements. Katuunko is impressed by the display, and opts to have Toydaria join the Republic. Furious about the outcome, Dooku (via hologram) orders Ventress to kill the king. Ventress dispatches the king's Toydarian royal guard and prepares to deal a killing blow, but Master Yoda arrives just in time, stopping Ventress mid-swing. Ventress's two battle droid guards move in, but the clones destroy them. Rather than surrender, Ventress quickly triggers an avalanche with pre-planted explosive charges, using it as a distraction to escape in her solar sailer. King Katuunko gladly accepts Yoda's offer to join the Republic, and Republic assault gunships come to retrieve the group.
As the droid forces approach, Master Yoda decides to face them alone, ordering his troops to stay out until their help is truly needed. Yoda ends up cutting the whole battalion to pieces, and angered, Ventress sends out three tanks. Yoda swiftly disposes of them, and Ventress counters with ten droidekas to deal with the Jedi Master. Just before the droidekas can finish the Jedi Master, Thire launches their last rocket at an overhanging bluff, sending an avalanche of rock crashing down on the droideka reinforcements. Katuunko is impressed by the display, and opts to have Toydaria join the Republic. Furious about the outcome, Dooku (via hologram) orders Ventress to kill the king. Ventress dispatches the king's Toydarian royal guard and prepares to deal a killing blow, but Master Yoda arrives just in time, stopping Ventress mid-swing. Ventress's two battle droid guards move in, but the clones destroy them. Rather than surrender, Ventress quickly triggers an avalanche with pre-planted explosive charges, using it as a distraction to escape in her solar sailer. King Katuunko gladly accepts Yoda's offer to join the Republic, and Republic assault gunships come to retrieve the group.
shadow of malevolence
Jedi Master Plo Koon is serving as a fighter escort to a group of Y-Wing bombers led by Anakin Skywalker to the Kaliida Shoals Medical Center for an inspection. Clone troopers injured during the fighting in the Outer Rim often wind up here, where the Kaminoan Nala Se and her staff are currently treating more than 60,000 wounded clones. Suddenly, as they near the Kaliida Medical Center, Master Plo's Jedi starfighter detects a ship of unknown intent. Moments later, the Malevolence comes out of hyperspace. The vessel serves as Grievous's flagship and possesses a ship-mounted ion cannon with immense power and a very short recharge time. The Malevolence then targets the medical center. As its ion pulse cannon charges, Anakin and Plo order the Y-Wings to direct all fire on the starboard cannon. Hammered by torpedoes, the ion cannons explode in twin bursts of flame. With newly arrived Republic capital ships led by Obi-Wan Kenobi raking his ship with laserfire, an enraged Grievous orders the wounded flagship back to Separatist-held space. The Y-Wings return to the Resolute, but Anakin brings his Y-Wing in too fast and skids across the hangar before coming to a halt. This brings about another lecture from Obi-Wan on carelessness.
destroy malevolence
Senator Amidala (with C-3PO in her company) is heading through hyperspace for negotiations with the InterGalactic Banking Clan Supreme Executive. An alarm sounds announcing their exit from hyperspace, and Padmé smiles, believing they have arrived at their destination. Once the ship comes out of hyperspace, they find themselves at the Battle of the Kaliida Nebula, alongside the retreating Malevolence. She manages to contact the nearby Jedi cruisers before she is pulled into the warship via a tractor beam. Anakin heads a rescue mission composed of him, Obi-Wan and Artoo to save her. The Twilight then latches onto the Malevolence by an emergency air lock and they board the ship and manage to make it to the warship's transportation system. After crossing the perilous tracks by leaping onto the trains and then off, the Jedi find Padme and Threepio ambushed by battle droids, who are easily subdued.
Suddenly the emergency security measures are activated, splitting up the group. Artoo, who is stuck with Obi-Wan informs the Jedi that the hyperdrive is close to finishing; Obi-Wan goes to destroy the hyperdrive. However, Grievous learns of this and sends droids down to guard the drive. Obi-Wan duels with Grievous and manages to avoid the cyborg's clutches.
Meanwhile, Anakin, Padmé and Threepio reach the bridge when the ship is almost ready to jump to hyperspace. They quickly destroy all the droids and rig the ship's navicomputer to crash into the nearby dead moon of Antar. They then leave the bridge, reaching the Twilight along with Obi-Wan and R2-D2 and as they leave the ship, Grievous escapes in his starfighter. The droids on the warship then try to jump to hyperspace, only to discover that Anakin rigged the navicomputer to set a course right into the moon. Grievous watches in horror as the ship crashes into a nearby moon, then flees the system.
As soon as the Twilight rejoins the Resolute, the cruisers exit into hyperspace, leaving behind the now-safe Kaliida Medical Center.
rookies
A Republic shuttle carrying
Commander Cody and Captain Rex leaves the Resolute and
enters hyperpace, bound for the Republic listening outpost on the
Rishi moon. They need to make sure it is running at peak efficiency
because the listening
post is vital in keeping an eye on Separatist activities and making
sure they do not try to slip past and launch a surprise attack on Kamino, the center of clone production and training. On the Resolute, Anakin sees that the
all-clear signal is being broadcast, and waits for the clones' return.
Behind the planet, three Separatist battleships are also monitoring the base. In the lead battleship, Grievous sees the all-clear signal is on and laughs evilly. He then contacts a team of commando droids below, ordering them to kill all arrivals. The commando captain passes this on to his team as a Republic shuttle lands on the outdoor landing pad. Commander Cody and Captain Rex exit and are met by a peculiar "clone" who gestures awkwardly and talks like a droid. The "clone" tries to convince them that the base is in perfect condition and that an inspection is unnecessary. A warning flare suddenly rises up from the crater below. Rex immediately shoots the impersonator, revealing it to be a droid commando in disguise. Suddenly more droids begin to attack them and destroy their ship with thermal detonators. Under the cover of the explosion, Rex and Cody escape into a deep crater where they see three clone troopers being attacked by a massive Rishi eel. Cody shoots it in the eye, getting it to retreat. The clone officers meet up with the three rookie clones, Fives, Echo and Hevy. They are the sole survivors of the outpost, which was invaded by the team of commando droids and overrun. Suddenly, the eel silently emerges from one of the many caves in the crater. After a brief battle, Echo, who is carrying a rocket launcher, blows the creature's head off, and it dies. They explain to the rookies that they need to take the base with their new support. Rex and Cody are determined to retake the base, and Hevy, Fives, and Echo are up for the task.
After climbing back up to the surface, Rex uses a severed tactical droid head to convince the droid guards to open the door. The clones charge into the base, killing the droid commando commander and quickly regaining control. Unfortunately, they see a Separatist landing ship coming in, unleashing an army of battle droids. Not wanting the base to fall back into enemy hands, the clones resolve to blow it up with plastic explosives, which would disrupt the all-clear signal, thereby alerting the Republic. Hevy volunteers to hold off the droid forces with his recently acquired Z-6 rotary cannon. The clones collect plastic explosives and pile them around the base's command center. They escape into the tunnels as Hevy realizes that the remote is malfunctioning. He decides to sacrifice his life and arm the explosives manually. As the droid army enters the base, they tell Hevy to surrender since he is outnumbered. He simply laughs and activates the explosives. The base, along with Hevy, is destroyed, and the landing platform is severed, sending the landing ship to the bottom of the crater. The clones stand on the pathway to the platform, and a super battle droid body lands at Cody's feet. Rex then catches Hevy's helmet, and they take a moment of silence for their comrade.
In space, Anakin sees that the all-clear signal has been switched off, and alerted, he leads the five Jedi cruisers to the dark of the moon, where they open fire on the Separatist frigates. After taking out his frustration on a nearby battle droid, Grievous orders a full retreat. Two Republic gunships come down to pick up the surviving clones.
duel of the droids
After Jedi General Anakin Skywalker's astromech droid, R2-D2, was lost during the Galactic Republic's defense of the planet Bothawui, the Trandoshan scavenger Gha Nachkt salvaged the droid from the planet's asteroid belt and promised him to the Confederate General Grievous in exchange for credits. Skywalker and his Padawan, Jedi Commander Ahsoka Tano, were issued R3-S6 as a replacement droid but were unaware that he was a spy working for Grievous. Jedi General Obi-Wan Kenobi ordered Skywalker to find and destroy Skytop Station, a Confederate listening post. After discovering the station over the moon Ruusan 2 in his personal ship, the Twilight, Skywalker learned that R2-D2 was aboard the station. Skywalker decided to rescue the droid, while Tano planted explosives around the station with a squad of clone troopers. Tano and the clones first engaged battle droids in a crossfire outside the reactor room. When Grievous arrived and attacked the group, Tano distracted the cyborg general by leading him into a storage chamber and performing stealth attacks while the remaining clone--Captain Rex—finished the mission.
Skywalker was able to retrieve his droid from Confederate IG-100 MagnaGuards and activate the explosives; with its anti-gravity repulsorlifts damaged, the station began to be pulled into the moon. Anakin and R2-D2 arrived in the south landing bay to rendezvous with the Twilight, where Rex was waiting for him. However, R3-S6 trapped the group in the hangar and activated several Vulture droids. B2 super battle droids entered the room and engaged Skywalker and the clones. and, with its anti-gravity repulsorlifts damaged, the station began to be pulled into the moon. Grievous evaded Tano through an air vent and made his way to his personal fighter, and escaped. Tano also went through the air vent and arrived in the landing bay, and R2-D2 was able to open the hangar door from an external terminal; the droid also engaged the spy droid, R3-S6, in a battle on a catwalk which led to the astromech port. The brawl ended when Skywalker, in his Jedi interceptor he stored in the Twilight, hammered the catwalk with torpedoes, sending R3-S6 tumbling off. Skywalker retrieved R2-D2 in his interceptor, escaping the station with his team.
Skywalker was able to retrieve his droid from Confederate IG-100 MagnaGuards and activate the explosives; with its anti-gravity repulsorlifts damaged, the station began to be pulled into the moon. Anakin and R2-D2 arrived in the south landing bay to rendezvous with the Twilight, where Rex was waiting for him. However, R3-S6 trapped the group in the hangar and activated several Vulture droids. B2 super battle droids entered the room and engaged Skywalker and the clones. and, with its anti-gravity repulsorlifts damaged, the station began to be pulled into the moon. Grievous evaded Tano through an air vent and made his way to his personal fighter, and escaped. Tano also went through the air vent and arrived in the landing bay, and R2-D2 was able to open the hangar door from an external terminal; the droid also engaged the spy droid, R3-S6, in a battle on a catwalk which led to the astromech port. The brawl ended when Skywalker, in his Jedi interceptor he stored in the Twilight, hammered the catwalk with torpedoes, sending R3-S6 tumbling off. Skywalker retrieved R2-D2 in his interceptor, escaping the station with his team.
Lair of grievous

Jedi Master Kit Fisto follows General Grievous’s ship to Vassek. On the planet he rendezvouses with a squad of Special Forces clone troopers accompanied by Clone Commander Frost and his old apprentice, Nahdar Vebb. Privately, the heavy weapons clone trooper argues with Commander Frost about having to fight alongside a droid. The Jedi and their squad of clones find a secret door to a castle, and Kit finds a way to open it.They attempt to sneak up on Nute Gunray, but all they find is a hologram of the Neimoidian. It soon turns into a gloating hologram of Dooku, and the group instantly realizes that the castle is the lair of Grievous. Kit devises a plan to ambush Grievous as soon as he arrives. After landing his ship inside the castle, Grievous is confronted by the Jedi and the clones. A skirmish breaks out and Grievous' legs are chopped off above the knees. As Grievous escapes to his control room to undergo repairs from his medic droid, EV-A4-D, he orders his MagnaGuards to blow up the clones' transport to cut off their escape. They also attempt to destroy Kit's starfighter and his droid, R6-H5, but the astromech manages to pilot the fighter away from danger. Meanwhile, Kit, Nahdar, Frost, and the remainder of their clone squad try to retreat from the castle, but Grievous locks it down. As they explore the fortress, a trapdoor on the floor opens beneath them to reveal a molten incinerator vat below. Kit and Nahdar jump in time to avoid it, and Clone Commander Frost and the heavy weapons clone trooper use a cable to cling to the side of the pit and climb up. Soon they meet Grievous' pet roggwart, Gor. In a short battle, Kit kills Gor, though the heavy weapons clone is also killed during the fight, an event that angers the young Nahdar. Frost also promises to avenge the fallen heavy weapons clone. The Jedi and droid soon find the entrance to Grievous' control room, and they try to sneak in. Kit calls for R6-H5 to meet them at the south landing platform. After an intense lightsaber duel with Grievous, the Jedi start to gain the upper hand, but some of Grievous' MagnaGuards arrive, which turns the odds against them. As R6-H5 arrives with the starfighter, Vebb, after being taunted by Grievous, chooses to stay behind and confront the cyborg instead. The Mon Calamari Jedi leaps off the ship and skillfully defeats all five of Grievous' guards. Vebb proceeds to attack Grievous, but the general slices the young Jedi to pieces. Fisto and Frost escape and return to the Jedi Temple on Coruscant.
jedi crash
Anakin and Ahsoka's fleet go to assist the fleet of Sarsat's fleet, which is being heavily damaged by three Munificent-class star frigates. The Separatist droid commander, a tactical droid named TI-99, see an opening as the frigates dispatch rocket droids onto her ship's hull. Anakin and Ahsoka arrive just in time, the Resolute launching three gunships. Anakin manually activates all of the ship's fire-fighting mechanisms, stopping the out-of-control fire. He is celebrating in his gunship before realizing that they left Aayla behind, and returns to the crumbling ship. Meanwhile, on the Resolute, Admiral Yularen receives Sarsat's distress call and sends a Republic cruiser to pick him up. It is unfortunately captured by TI-99's command vessel via tractor beam. While Anakin goes to rescue Sarsat, Ahsoka decides to free the cruiser. Her gunship opens fire on the vessel, using proton torpedoes to destroy it. The cruiser proceeds to Sarsat's vessel, and Anakin and Ahsoka land in the ship. They rendezvous with Sarsat, but before they can escape in their gunships, rockets droids destroy them. Anakin, Ahsoka, Sarsat, and the android BLU destroy all rocket droids before making their way to a cruiser in the lower docking bay. The cruiser flies over to the Resolute and docks there, and the Resolute makes the jump to hyperspace.
defenders of peace
In the Resolute, R2-D2 is repairing the damage done to the Republic cruiser by the battle over Quell. However, the ship proves unable to start, and Sarsat suggests Anakin be called in for his excellence in starships. He manages to restart the engines, but it is set in overdrive, and the cruiser rockets out of the Resolute and crashes on a nearby planet. Once they crash land, they set up a camp from some of their wrecked ship's parts. BLU inadvertedly stumbles upon a village of the planet’s monkeylike natives, who are known as Lurmen. Meanwhile, a Separatist frigate lands on the seemingly unpopulated planet. Lok Durd announces to his droids that he had developed a defoliator, capable of destroying organic life while leaving non-organics unharmed. The weapon is test-fired, leaving the droids assigned to the test intact, but destroying the local vegetation in a wide area. Lok declares the test a success, but Dooku suggests that it would be best to test the defoliator on living targets, like the Lurmen. The Jedi, clones, and Sarsat decide to leave the Lurmen village and bring the Separatist forces to their crashed cruiser. BLU will stay behind to defend the village. As soon as the battle begins, the Jedi realize they are badly outnumbered and call for help. Admiral Yularen receives their call on the Resolute and sets a course for the planet. Lok sends his troops forward to clear a path for his defoliator. BLU finds himself besieged by droids, including a new version of super battle droids with cortosis armor, a substance that blocks lightsaber attacks. The wrist guns can also swivel in any direction. BLU discovers a weak spot in the droids, executing a very precise overhead slash targeting the small gap between the two breastplates and slicing a cortosis droid's torso in half. Meanwhile, the outside battle goes poorly. The Jedi and clones manage to fend off the first wave, but the second wave of droids gets the better of them. With their village safe, the Lurmen engage the droids, toppling them down to be decapitated. BLU destroys the defoliator cannon and Anakin captures Lok through levitation.
the hidden enemy
Anakin, Obi-Wan, Joel-Nathan and their clones prepare to ambush the advancing droid forces from two towers on the planet Christophsis. Just as they are about to fire on the droids, they see the advances waving up at them and droids suddenly appear in Obi-Wan's building. Anakin calls in a gunship for immediate evacuation before he and Joel-Nathan leave their squad to assist Obi-Wan. They escape to the roof, and the droids follow them. Their gunship arrives, picking them up, but not before destroying the command tactical droid TJ-55 and taking his head to find out how the Separatists discovered their plan. Joel-Nathan remains behind with the clones to provide the gunship with more time.
On the gunship, Obi-Wan and Anakin analyze the droid's memory and discover the hiding place of the Separatist general Asajj Ventress. They arrive at the enemy base and inside, they meet Asajj Ventress again and begin to duel with her. The Jedi manage to overcome Ventress and demand her surrender, but as they edge closer to capture her, she creates a large hole in the floor beneath their feet with her lightsabers, pushing them one level down. Ventress taunts them and runs away, and the Jedi follow her, discovering that she has set up a whole army to invade Christophsis. The Jedi engage Ventress again, overbalancing the tri-droid she is standing on. As it falls to the ground from ten stories, they leap on to confront Ventress once more. They knock her off and intercept two battle droids on STAPs, stealing the STAPs for an escape.
On the gunship, Obi-Wan and Anakin analyze the droid's memory and discover the hiding place of the Separatist general Asajj Ventress. They arrive at the enemy base and inside, they meet Asajj Ventress again and begin to duel with her. The Jedi manage to overcome Ventress and demand her surrender, but as they edge closer to capture her, she creates a large hole in the floor beneath their feet with her lightsabers, pushing them one level down. Ventress taunts them and runs away, and the Jedi follow her, discovering that she has set up a whole army to invade Christophsis. The Jedi engage Ventress again, overbalancing the tri-droid she is standing on. As it falls to the ground from ten stories, they leap on to confront Ventress once more. They knock her off and intercept two battle droids on STAPs, stealing the STAPs for an escape.
blue shadow virus
Padmé and Threepio arrive on Naboo and are greeted by Queen Neeyutnee and Captain Typho. The Queen demands that she petition the Senate or the Jedi Council to assist them; Padmé says that they must analyze the tactical droid caught from the scouting party. Captain Typho beats the droid to try and get information, and after giving up and trashing the droid in the process, Threepio finds out about a secret laboratory when he activates the droid’s playback switch. Padmé opts to personally search for this secret lab. As they traverse the swamp, they are being spied on by a camera. Then they find a secret hatch, but there is no way to open it. Suddenly, they are surrounded by battle droids, taken prisoner and placed into the bunker. The man in charge, Dr. Nuvo Vindi, reveals that he has recreated the Blue Shadow Virus, a deadly disease that was wiped out from the galaxy long ago. He had also perfected it, able to turn it from a liquid strain into an airborne strain, which would be used to eradicate the warmongers. Padmé manages to send a call for help to the Republic before being found out.
Upon arriving on Naboo, Anakin, Ahsoka and Obi-Wan learn of Padmé and Threepio's departure. Anakin sends Ahsoka and Captain Rex to find them, while the rest of them get positioned for a three-pronged attack on Vindi's secret lab, which has three entrances. Ahsoka and Rex search the swamp, inadvertently find a spy cam and manage to hide from it. Ahsoka contacts Anakin and Obi-Wan, who instructs her to detonate a bomb in the south bunker while they enter through the hatches. Ahsoka levitates a thermal detonator, perfectly dropping it on the hatch and distracting many of the droids to her position; Rex assists her as they hack their way through droids before having to retreat with the entrance of droidekas. This allows the others to infiltrate the base unheard. But as Anakin enters Vindi's lab, Vindi discovers them and gives his LEP servant droid a vial of the virus should Vindi be captured. Anakin finds Vindi torturing his hostages with electricity and saves them. As Vindi leaves, Obi-Wan arrives with the Bomb Squad. Unfortunately, as Obi-Wan and the bomb squad finds all the bombs, Vindi activates them. With Vindi and the LEP droid each carrying a detonator, they split up between the two. Obi-Wan and Anakin try to catch Vindi, but the villain throws away a number of virus bombs, forcing Obi-Wan to catch them while Vindi makes his escape. Meanwhile, Padmé and Ahsoka track down the droid, managing to destroy it to prevent it from escaping. With the bomb squad's help, they are able to deactivate all the bombs, just as they capture Vindi.
Upon arriving on Naboo, Anakin, Ahsoka and Obi-Wan learn of Padmé and Threepio's departure. Anakin sends Ahsoka and Captain Rex to find them, while the rest of them get positioned for a three-pronged attack on Vindi's secret lab, which has three entrances. Ahsoka and Rex search the swamp, inadvertently find a spy cam and manage to hide from it. Ahsoka contacts Anakin and Obi-Wan, who instructs her to detonate a bomb in the south bunker while they enter through the hatches. Ahsoka levitates a thermal detonator, perfectly dropping it on the hatch and distracting many of the droids to her position; Rex assists her as they hack their way through droids before having to retreat with the entrance of droidekas. This allows the others to infiltrate the base unheard. But as Anakin enters Vindi's lab, Vindi discovers them and gives his LEP servant droid a vial of the virus should Vindi be captured. Anakin finds Vindi torturing his hostages with electricity and saves them. As Vindi leaves, Obi-Wan arrives with the Bomb Squad. Unfortunately, as Obi-Wan and the bomb squad finds all the bombs, Vindi activates them. With Vindi and the LEP droid each carrying a detonator, they split up between the two. Obi-Wan and Anakin try to catch Vindi, but the villain throws away a number of virus bombs, forcing Obi-Wan to catch them while Vindi makes his escape. Meanwhile, Padmé and Ahsoka track down the droid, managing to destroy it to prevent it from escaping. With the bomb squad's help, they are able to deactivate all the bombs, just as they capture Vindi.
Gungan general
After Supreme Chancellor Palpatine and representatives received a message from Hondo Ohnaka concerning a reward for the capture of Count Dooku, Anakin Skywalker, and Obi-Wan Kenobi, at the suggestion of Senator Padmé Amidala, Palpatine appoints Representative Jar Jar Binks to travel to the pirates' lair on Florrum with a bounty of spice on board as a ransom for Dooku and the Jedi. Unfortunately, upon their arrival, Weequay pirate Shahan Alama decides to go behind Hondo's back, since he thinks dealing with the Separatists would have been more profitable, and shoots down the shuttle to sack the ransom for himself. Jar Jar subsequently gets unintentional command of the surviving clone crew. The group follows a series of power supply lines straight to the pirate base. Upon his return to the base, Shahan lies to Hondo, saying that the Republic brought an army, and dispatches tanks after the clones and Jar Jar. Commander Frost leads the clones on a mission to destroy the power lines as Jar Jar goes to “negotiate” with the pirates. As the Weequays take him hostage, Jar Jar accidentally manages to shut down the power grid. When the blackout hits the base, the Jedi and Dooku make their escape and go their separate ways: Dooku takes off in a ship; Anakin and Obi-Wan take Hondo hostage before meeting Sarsat outside. Obi-Wan tells Anakin to let Hondo go, as they don't have any quarrel with him since Dooku had escaped. Hondo commends the Jedi on their honor, but Obi-Wan reminds him that Dooku is likely to seek revenge on him, before the Twilight takes off.
storm over ryloth
Emir Wat Tambor has taken over the planet Ryloth and blockaded it to prevent any help from arriving. He is stripping the planet of every last Twi'lek valuable and is holding the Twi'lek Senator Orn Free Taa captive.
The Resolute and Defender arrive in the system. Anakin reports his arrival to Joel-nathan Joe and Plo Koon. Plo reminds Anakin that time is running short, and despite losing almost half his forces, Plo and Joel-nathan give Anakin one planetary rotation to breach the blockade or they'll have to postpone the invasion. Anakin stresses that the Twi'lek people cannot wait much longer, and the invasion must go on.
The Republic ships charge the blockade, consisting of a single Lukrehulk-class battleship. The Defender is heavily damaged and Admiral Yularen is knocked unconscious. Anakin quickly forms a plan.
Alarms sound aboard the Resolute, and a recovered Yularen exits his quarters to find clone troopers running to stations. A clone reports to Yularen that the Defender is being evacuated for an unknown reason. When she arrives in the hangar, everything from the Defender is being loaded into the Resolute. Anakin fills Yularen in on his latest plan: he proposes that he will pilot the Defender alone into the lead battleship, taking out the enemy commander and thus leaving only easily-outmaneuvered battle droids in command. Yularen thinks it's a reckless plan, but Anakin leaves it to Yularen to command the remaining forces while he remains defenseless in the Defender.
The Defender emerges from hyperspace, and Anakin plots a collision course with the Droid Control Ship. The Resolute launches a squad of V-19 Torrent starfighters, with Ahsoka leading the charge in a Y-wing bomber. Two Separatist frigates come out of hyperspace and attack the Defender in an attempt to stop it from destroying the battleship. Ahsoka and the clones come through, though, and the Defender continues on its course. A team of rocket battle droids board the ship to try and stop Anakin, but he swiftly defeats the squad.
Anakin leaves the Defender with R2-D2 and boards his Jedi starfighter. The Defender pierces the center sphere of the battleship, and all Republic forces regroup on the Resolute. Following this, three Acclamator assault ships carrying Plo Koon, Joel-nathan Joe, and their troops emerge from hyperspace. Plo Koon contacts Yularen, wryly commenting on the state of Anakin's invasion fleet.
innocents of ryloth
Aboard an Acclamator I-class assault ship, Plo Koon tells Joel-nathan Joe as he boards the Crumb Bomber that when he takes the city of Nabat they'll have their landing zone for the ground assault forces. However, Wat Tambor anticipates this, and Tactical droid commander TX-20 readies his five proton cannons, while using captive Twi'leks as a “living shield” to further protect them, estimating that the Jedi will not risk a heavy attack.
Joel-nathan and Frost brief the Spectres on their mission, and while they must retake the city, they cannot destroy the Twi'leks’ home, and are allowed to use blasters and EMP grenades only. However, they do allow themselves one AT-AP to help destroy the proton cannons. Above, the Acclamator assault ships are attacked by the proton cannons below. as the Crumb Bomber lands with the other gunships, and the Spectres move towards Nabat. Droid gunners on the outskirts of Nabat pin down Spectres. Joel-nathan, Reaper, and BLU utilize droid poppers to take out the droids in the bunkers.
After losing contact with the droids on the village’s outer perimeter, TX-20 sends two recon droids to find out the Jedi’s plan, while Joel-nathan dispatches Reaper, Sarsat, and Frost to scout ahead. Reaper, Sarsat, and Frost move to the courtyard and discover the Twi’leks being held hostage in the cannons' immediate vicinity. Joel-nathan, realizing that the hostages will make this difficult but not impossible, hits upon a plan to disable the guns without letting the hostages come into any danger. In the courtyard, the group calls for their AT-AP, and a gunship promptly drops it off.
TX-20 reveals his plan: to use starved gutkurrs to take out the Republic forces. Seeing the Republic troops on the move, TX-20 orders the gutkurrs released. Joel-nathan uses the Force to levitate Frost and Sarsat out of reach of the hungry creatures. But a gutkurr comes up behind him and is about to attack when Reaper materializes and fires into it point-blank with his Hellfire shotguns, killing it. Joel-nathan uses the Force to persuade the beasts to return to their holding pens.
After sneaking through the gutkurr holding area, the group finds TX-20 waiting with proton cannons directed towards them. Joel-nathan takes control of a proton cannon, and with the help of Reaper and Sarsat, he manages to destroy the other cannons targeting the Republic airships. The area is then placed into lockdown mode, with a shield protecting TX-20's AAT tank. The tank is also emitting a ray shield over the captive Twi'leks. Joel-nathan destroys the shield generator and enters the tank, destroying the ray shield generator. However, TX-20 opens fire and blows up the clones' proton cannon. He then advances on a vulnerable Joel-nathan and Frost, but the freed Twi’leks overrun the tank and tear TX-20 to bits.
The Acclamator transports land, and Plo Koon commends Joel-nathan on his victory. However, their new objective is much harder: to take the Ryloth capital of Lessu. And they move out toward the sun, intent on freeing this world.
liberty on ryloth
From the city of Lessu, Wat Tambor observes the oncoming Republic forces via binoculars and discovers that the Republic forces will reach Lessu sooner than expected. He confers with his battle droid advisor, who suggests shutting down a plasma bridge, being the only way in or out of Lessu.
At the Republic landing site, Commander Frost informs Joel-Nathan Joe that they will have to reopen the plasma bridge for troops to enter. With republic forces stretched thin, Joel-Nathan decides to make a do-or-die run for it and try to take the city with his limited resources. He decides to enlist the help of fellow freedom fighter Cham Syndulla.
Meanwhile, Count Dooku informs Tambor that he is no match for Joel-Nathan and orders him to retreat with what valuables he can and destroy everything else. Tambor is rather alarmed, but Dooku explains: Ryloth's fate will demonstrate to the galaxy the cost of a "Republic victory". However, Tambor is not yet ready to leave. The emir oversees the loading of valuables onto his shuttle by Twi'lek slaves. A droid tells Tambor that two more transports are still coming in from the south sector, thus Tambor decides to wait for the last of the valuables of the world to arrive and be loaded onto his shuttle, much to the fury of Dooku, who wants him out of the city before the Republic arrives.
The Republic forces arrive in the flatlands of Cazne, stumbling into a Twi'lek freedom fighter's camp, and they are escorted to their leader, Cham Syndulla. Cham has misgivings about allying with the Republic, but Joel-Nathan helps him reach an agreement: Joel-Nathan will not let Ryloth fall to another armed occupation, while Cham promises he will not seek power, and rallies his men.
Mace Windu orders the troopers to get the bridge back up while he holds the droids off, and Ponds begins his charge. Plo takes out an entire droid squad and a tank on his own, while two of the other Spectres, Reaper and Sarsat, get the bridge up just in time for Cham, Ponds and their forces to cross. The freedom fighters and Lightning Squadron take out the AATs and the droids quickly.
Tambor is preparing to leave with the last of his treasures. However, Mace Windu arrives and subdues Tambor's 2 battle droid guards and holds Tambor at bay. Cham also arrives, and points his blaster at Tambor. Tambor tries to reason with the Jedi but Joel-Nathan refuses since he has the upper hand. Tambor then asks Cham for his terms of surrender; Cham states that they are unconditional, and Tambor reluctantly agrees. Syndulla thanks Windu for freeing his world. Later, Cham and Senator Taa wave to the people in a parade with both the freedom fighters and the clone forces with Joel-Nathan and Frost watching in satisfaction. Ryloth is free.
weapons factory
With the recent capture of Lok Durd, Count Dooku is pleased to learn that the droid foundries on Geonosis have finished production of the Super Tanks. Poggle is going down to see the completion personally.
The Republic army is pushing forward towards the massive droid foundry. As the clone army prepares for combat, the four Jedi analyze the tactical data on the droid factory. Skywalker boldly suggests a frontal attack, but Reaper, who is an acting commander, says that a frontal assault would be too risky. He suggests to infiltrate the catacombs beneath the factory, accessible through the bottom of the gorge, entering the foundry and destroying its main reactor with explosives. Unduli opts that she and Skywalker keep Poggle the Lesser's forces occupied, while the Padawans, assisted by Reaper, infiltrate the factory.
Unduli and Skywalker then prepare a frontal assault by having their troops move straight towards the bridge. Meanwhile, inside the factory, Lord Poggle's tactical droid TX-21 monitors the factory's efficiency. Though it is operating at 50 percent capacity, it has already churned out ten garrisons of new droids ready to deploy. A new weapon, super tanks capable of repelling Republic artillery, approaches operational status as well. Anakin and Luminara, along with Captain Rex and Commander Gree's troops march across the bridge to battle the droids. Unfortunately, they fall into a trap, as Geonosians start coming out of the surrounding spires, leaving their forces in a deadlock. As the Jedi continue to push forward, destroying three waves of Separatist forces, TX-21 sets loose the super tanks, equipped with ray shielded armor powerful enough to stand against all forms of Republic artillery. Anakin finds that even lightsabers prove uneffective against the tanks' armor.
Down below, the Padawans and Reaper have successfully infiltrated the catacombs, with Barriss using the Force to sense the entrance behind the rock wall. They sneak past a wall filled with sleeping Geonosians, and proceed carefully, but are unable to avoid awakening several Geonosians, who alarm the rest. They manage to defeat them, but the sonic cannon rips off one of the Reaper's arms, which he regenerates using his mist abilities. Eventually, the trio make it to the factory's main reactor. However, Poggle have come to see the reactor's efficiency, and calls in his tactical droid, one super tank and many Geonosian warriors and battle droids. All forces start firing at the Jedi, believing Reaper to be one of their own. Reaper takes advantage of this and attacks the super tank, destroys the droid drivers and successfully takes control of the tank. They decide to use the tank to destroy the reactor. The explosion destroys the factory, causing them to take shelter in the super tank.
Outside, the clone forces make short work of the battle droids. With the super tanks advancing, Skywalker orders a retreat. Suddenly, the spire the factory was built in collapses on the bridge the super tanks are moving towards, causing them to fall off the edge into the precipice. A super tank is launched by the explosion over to the Republic side, and the Padawans and Reaper climb out, the tank's heavy armor protecting them from the massive explosion.
legacy of terror

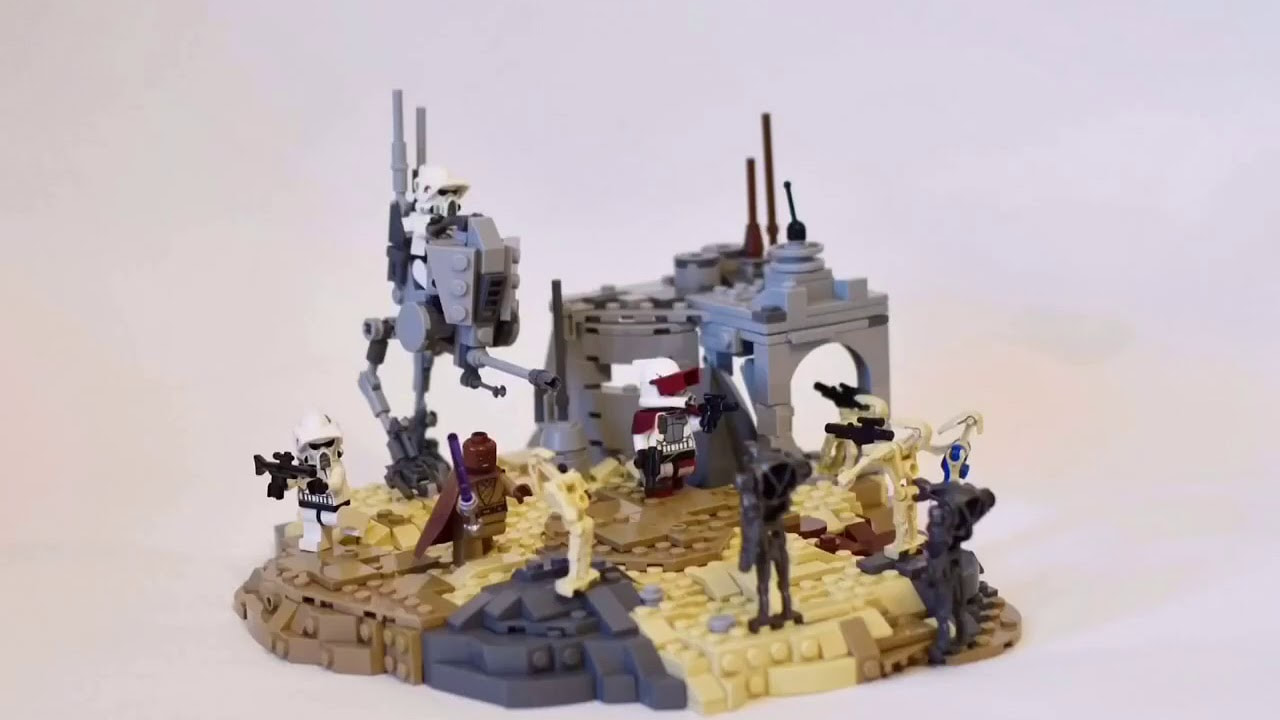
Up on a cliff, Luminara, Obi-Wan, Anakin and Commander Cody are recuperating from the fight. Luminara spots Poggle escaping in an AAT tank and sets out on a speeder to find him, as his capture, along with any information he has, would prove useful against the Separatists. Luminara and her clone companion Buzz follow Poggle's trail, despite a warning from Obi-Wan. He wants to pursue them, but Cody advises to wait until an approaching sandstorm passes over. Luminara and Buzz brave through the sandstorm, tracking Poggle to the Progate Temple. Poggle spots them from inside the temple. Buzz draws his blaster, becoming unnerved by several horrendous statues of Geonosians. Luminara finds a hole into the catacombs beneath.
At the Republic base camp, Sarsat, Reaper, BLU, and Commander Frost are repairing a gunship. Moments later, Luminara holographically calls them, reporting that she has found what seemed to be a munitions container. She is advised by Commander Frost via hologram to wait for support. Suddenly, Luminara is shown fighting an invisible enemy before contact is lost. The group takes a gunship and two speeder bikes to the temple.
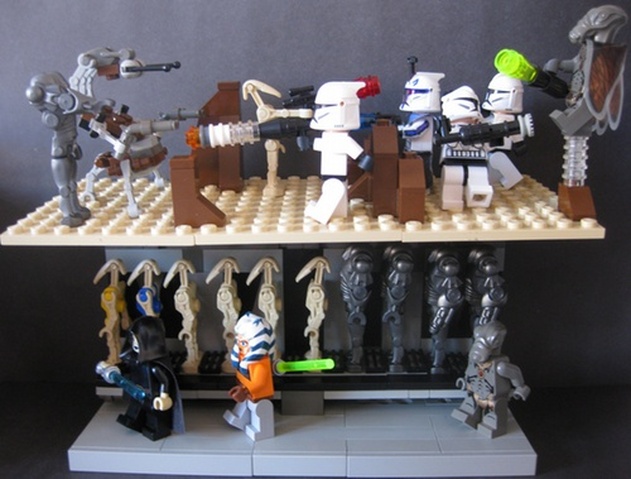
The Spectres bring a squad to the temple. The sandstorm outside gets worse, carrying off one of their BARC speeders. They see a statue of what seems to be a Geonosian queen's head above the archway of a dark tunnel. Reaper mentions that there are legends of Geonosian queens, but no proof has been found of their existence. They solve a strange Geonosian puzzle and go through the now-open archway, entering a strange maze.
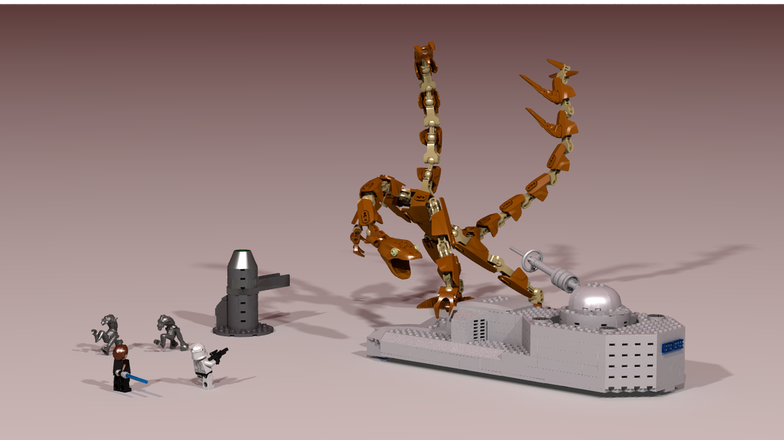
Reaper and Sarsat find a secret entrance by moving a Geonosian statue. Going through a hole in the floor, they are attacked by undead Geonosians, who are able to move even if shot or hacked; there is also something worm-like moving through their face openings. Frost remembers rumors of a hive mind able to control Geonosians, even after they are dead. Because they are too deep underground to contact reinforcements, they manage to escape by going down the entrance to the throne room. It is here that they find Luminara, held in energy bonds before the Geonosian Queen. Reaper prepares to charge forward, but Sarsat has a different strategy: negotiation. He diplomatically tells her to surrender, but the queen refuses. A Geonosian zombie approaches Poggle the Lesser with a worm, who prepares to insert it in Luminara's nose. The queen emits a loud cry, bringing rocks down over the entrance. During this distraction, two zombies approach and nab the clones' weapons. An enraged Reaper targets one of the cave supports, causing the ceiling of the cave to weaken. The queen fires eggs at them from her ovipositor, having the ability to lay an egg every eight seconds. Reaper follows this up with attacks to the remaining temple supports as Sarsat cuts Luminara free and Frost takes Poggle prisoner. The queen moves in on Luminara, intending to control her with the brain worms, but Reaper threatens her with his blaster. The queen backs off, and is buried under a pile of rocks. The Spectres attempt to escape the collapsing temple, with the zombies after them. They reach a dead end, trapped by the zombie horde. Luminara takes Cody's blaster and fires rapidly at the heads of several dozen zombies. An escaped queen moves in on Luminara, but she fires at the cavern's ceiling, burying the queen and her undead. Then, a rush of dust, and air pushes them up through the hole. Luminara returns Cody his blaster, who trains it on Poggle.
At the Republic base camp, Sarsat, Reaper, BLU, and Commander Frost are repairing a gunship. Moments later, Luminara holographically calls them, reporting that she has found what seemed to be a munitions container. She is advised by Commander Frost via hologram to wait for support. Suddenly, Luminara is shown fighting an invisible enemy before contact is lost. The group takes a gunship and two speeder bikes to the temple.
The Spectres bring a squad to the temple. The sandstorm outside gets worse, carrying off one of their BARC speeders. They see a statue of what seems to be a Geonosian queen's head above the archway of a dark tunnel. Reaper mentions that there are legends of Geonosian queens, but no proof has been found of their existence. They solve a strange Geonosian puzzle and go through the now-open archway, entering a strange maze.
Reaper and Sarsat find a secret entrance by moving a Geonosian statue. Going through a hole in the floor, they are attacked by undead Geonosians, who are able to move even if shot or hacked; there is also something worm-like moving through their face openings. Frost remembers rumors of a hive mind able to control Geonosians, even after they are dead. Because they are too deep underground to contact reinforcements, they manage to escape by going down the entrance to the throne room. It is here that they find Luminara, held in energy bonds before the Geonosian Queen. Reaper prepares to charge forward, but Sarsat has a different strategy: negotiation. He diplomatically tells her to surrender, but the queen refuses. A Geonosian zombie approaches Poggle the Lesser with a worm, who prepares to insert it in Luminara's nose. The queen emits a loud cry, bringing rocks down over the entrance. During this distraction, two zombies approach and nab the clones' weapons. An enraged Reaper targets one of the cave supports, causing the ceiling of the cave to weaken. The queen fires eggs at them from her ovipositor, having the ability to lay an egg every eight seconds. Reaper follows this up with attacks to the remaining temple supports as Sarsat cuts Luminara free and Frost takes Poggle prisoner. The queen moves in on Luminara, intending to control her with the brain worms, but Reaper threatens her with his blaster. The queen backs off, and is buried under a pile of rocks. The Spectres attempt to escape the collapsing temple, with the zombies after them. They reach a dead end, trapped by the zombie horde. Luminara takes Cody's blaster and fires rapidly at the heads of several dozen zombies. An escaped queen moves in on Luminara, but she fires at the cavern's ceiling, burying the queen and her undead. Then, a rush of dust, and air pushes them up through the hole. Luminara returns Cody his blaster, who trains it on Poggle.
grievous intrigue
Grievous' destroyer boards Master Eeth Koth's flagship and Grievous enters the ship with MagnaGuards. The attackers kill most of the clone troopers, but Koth, after ordering his men to the escape pods, manages to defend himself against the commando droids and Grievous. Though Koth holds his own for a while, Grievous's commando droids soon join the battle and Grievous ultimately subdues Koth.
The Resolute receives a holo-transmission from Grievous, in which the general shows his victory over the Jedi. They pinpoint the signal's location, telling them that Grievous' ship is in the Saleucami system. Obi-Wan Kenobi, Anakin Skywalker and Adi Gallia thus set out to rescue Eeth Koth and to capture Grievous.
The ships under Kenobi's command emerge from hyperspace when Grievous is preparing to land on Saleucami, just as Grievous expected. Grievous pulls Kenobi's light cruiser in with a tractor beam, while Anakin and Adi break into the ship.
Kenobi's ship is then boarded by commando droids. Obi-Wan and Commander Cody fight commando droids first, then Kenobi fights the MagnaGuards and eventually Grievous. Anakin and Adi locate Koth captured in a containment field, but Grievous's tactical droid, TV-94, was expecting them and summons commando droids. The Jedi ultimately manage to destroy the all the droids present and release Koth. Adi goes to help Obi-Wan while Anakin carries Koth to his shuttle.
As Grievous roars that he is now the leader of the most powerful droid army the galaxy has ever seen, Obi-Wan asks what he intends to gain from being general of an army with no loyalty or spirit. Grievous answers that he hopes to gain a future...a future where there are no more Jedi. Obi-Wan Force-pushes Grievous into the window, gives him a chance to surrender, but Grievous escapes.
In the docking tube, Kenobi catches up to him, and Adi comes up behind him from his destroyer. The Jedi engage him in a brief duel, before the docking tube is torn open, creating a powerful suction. Grievous climbs aboard his ship using his metallic claws, and a clone trooper activates the blast shield, allowing them to get to safety. They chase after Grievous, who enters an escape hatch and boards a landing ship set for Saleucami. As a parting gift, the ship fires several missiles at the Jedi's general area. Obi-Wan uses the Force to move them several feet to the right before they explode and cut off their escape. Anakin blasts the hangar's shield generator and then picks up Obi-Wan, Adi and Cody in his shuttle from the destroyer's hangar.
The Republic light cruiser eventually explodes, a piece of it striking Grievous's landing ship and damaging it. The shuttle lands in the Resolute hangar.
the zillo beast
Republic forces have invaded the Separatist-controlled planet Malastare in hopes of obtaining fuel from the planet. The clone forces are badly outnumbered, however, and Mace Windu, Palpatine (via hologram) and Anakin Skywalker discuss the Electro-Proton Bomb, the Republic's latest superweapon, worried that the bomb could affect their troops as well as the droid army. Dr.Sionver Boll, the scientist who constructed the bomb confirms that it will not harm any Republic forces: its effects will only work on droids and all the probabilities have been assumed. The Jedi agree, and Rex scouts out a location to drop it.
Anakin joins the outnumbered Republic forces as they march toward the advancing Separatist forces. At the Separatist side, the tactical droid gives the order to attack. Captain Rex and clone troopers struggle to hold their ground, even as droid gunships soar overhead. Eventually the clones clear an area, and Anakin orders the Electro-Proton bomb to be dropped on the massive Separatist force. The pilot drops the bomb, annihilating the Separatist forces with a massive blast. The blast is followed by an EMP which cuts short-circuits all droids, but leaves the clone forces unharmed.
As the troops celebrate their victory, the ground starts breaking apart and sinking beneath their feet. The clones flee with Anakin, barely making it onto the ledge. The massive head of a huge reptilian creature turns and roars at them. The clones fire at the beast with no effect. It shakes them off and chases them until Windu, with the help of the Force, guides the beast out of the fight.
Anakin, meanwhile, finds that the beast's armor-like scales are virtually impervious to even his lightsaber. After making her surprise exit, Boll arrives and explains that the creature is a Zillo Beast; it was believed that they became extinct... until now. A clone soldier fires at a gap in the Zillo Beast's armor in an RX-200 Stun Tank, but this only enrages the beast further. It crushes the tank beneath its foot, then throws both Republic and Separatist vehicles at the remaining clone forces. Windu catches on, calling down several Stun Tanks. But they are delayed, so he orders the Republic's AV-7 Anti-Vehicle cannons to open fire to distract the beast. Finally, the Stun Tanks roll out to the pit and open fire. The provoked Zillo Beast throws debris at its attackers, destroying several tanks. After a rampage, concentrated fire from the tanks start to weaken the Zillo Beast, and it eventually collapses and roars in the face of Windu and Skywalker's tank before it loses consciousness, incapacitated. Two Republic gunships pick up the Zillo Beast to bring to Coruscant for study.
castle of doom

A mysterious group of renegades has kidnapped Jabba's son, and it's up to Joel-nathan Joe, Sarsat, and the Reaper to rescue him and bring him back home safely. Obi-Wan flies to Tatooine to assure Jabba that Rotta will be returned safely and to secure a promise by the Hutts to use their trading routes for safe passage within the Outer Rim.
After briefing in a Republic flagship, Joel-Nathan's forces descend through the clouds of the jungle planet of Teth for one of the many natural stone pillars which litter the landscape. Under heavy fire, Joel-nathan and Sarsat storm the monastery atop the pillar and find Rotta, who has gotten sick, only to be caught in an elaborate trap: Count Dooku has staged the kidnapping himself in order to blacklist the Jedi among the Hutts. First he has the Jedi retrieve the young Hutt to secure fake evidence, then Asajj Ventress, as the overseer of the operation, is charged with either retrieving or killing the young Huttlet.
While quarreling all the while about the proper procedure, yet slowly gaining respect of one another, Joel-nathan and Sarsat manage to escape the trap along with R2-D2 and hijack a derelict transport, which they use to travel to Tatooine. Ahsoka uses medicine onboard to treat the sick Huttlet. Reaper, alerted by Joel-nathan, arrives just in time to relieve Rex and the rest of his forces and engages Ventress in combat where he manages to defeat her, though Ventress flees in the face of capture.
In the meantime, Senator Amidala learns of Joel-nathan's mission. Worried about him, she decides to contact Jabba's uncle, Ziro the Hutt, who lives in a shady part of Coruscant. The Hutt strangely refuses to cooperate, and soon Padmé finds out why: Ziro has actually conspired with Dooku to engineer the downfall of his nephew to seize the power over the Hutt clans for himself. Padmé is discovered and detained, but a chance call by C-3PO enables her to summon help, and Ziro is soon arrested by the Coruscant Guard.
Upon their arrival on Tatooine, Joel-nathan and Sarsat are attacked by MagnaGuards starfighters and shot down. Faced with a long way across desert sands and relentless opponents, Joel-nathan devises a ruse; when Dooku corners Joel-nathan, the pack he is carrying is revealed to contain merely rocks. Sarsat and Reaper travel with Rotta to Jabba's palace unmolested, but just as they near it, the duo is ambushed by three MagnaGuards, whom they narrowly defeat. But as Joel-nathan, Sarsat, and Reaper enter the palace one after another, they are threatened with execution by Jabba's men even though Rotta is safely returned. Padmé calls just in time to convince Jabba of his uncle's duplicity, while the three heroes are triumphantly retrieved by Obi-Wan, Yoda, Cody and the clones.
hostage crisis
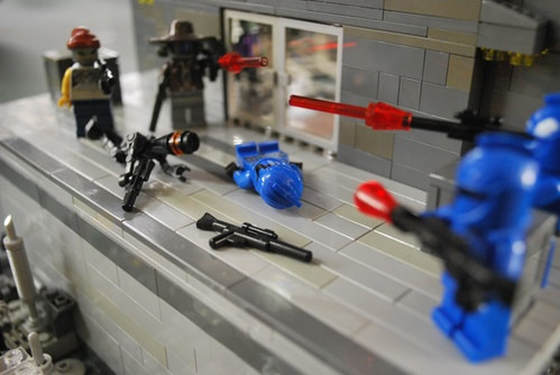
Ziro the Hutt has been imprisoned by the Republic, and it is up to Cad Bane and his crew of bounty hunters, along with a few droid enforcers, to free him. After a final mission brief, along with listing the rewards, the posse arrives at the Senate landing zone, where they meet the Gammorrean traffic official, who is not happy with their unauthorized arrival and has a nearby squad of Senate commandoes try to arrest him. However, three commandos are sniped by Aurra Sing from long-range, and the rest are quickly subdued. Aurra then meets the group on the landing platform. Suddenly, another commando squad charges out of the building but are promptly subdued by the bounty hunters.
Bane and his crew take out the rest of the senate commandos and then go down to the control panel room and subdue the droids there, leaving Robonino to get the power down. The bounty hunters then leave to "talk" to some senators. Suddenly, once all the senators are gathered in the lobby to discuss the Enhanced Privacy Invasion Bill, the bounty hunters enter in a blaze of gunfire, and surround and take them hostage. Bane then communicates with Chancellor Palpatine, demanding the release of Ziro the Hutt from captivity. When Palpatine tries to escape to get help, Bane proves his point by locking down the entire building, severing all communication with the outside.
HELIOS-3D arrives at the prison, where the commandos guarding Ziro refuse to release him, but after a direct order from Palpatine they have no choice. The bounty hunters start to plant bombs in the lobby that can go off if their laser detectors are triggered. This enables the hunters to leave the Senate unhindered, despite an attempt by Clone Commander Fox's detachment of the Coruscant Guard to have them arrested. Ziro congratulates Bane on a job well done, but Bane states that it's time to pay, saying he doesn't work for free.
